This is an Adobe After Effects/Trapcode Mir tutorial for creating the canyon/iceberg effect I used in two of my daily artworks.

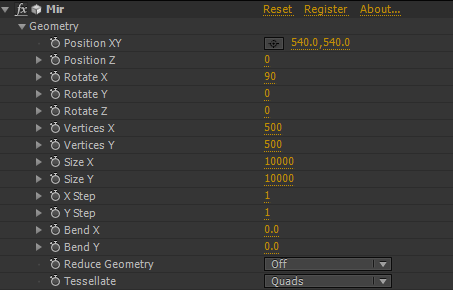
Create a new composition with your desired dimensions, I went with 1080 x 1080. Create a Camera. Create a solid and apply Trapcode Mir to the layer. Under the Geometry tab set Rotate X to 90. Change Size X and Size Y to 10,000 or another high value. Set Vertices X and Vertices Y to 500. Change Tessellate from Triangles to Quads. Settings your vertices to 500 can be intensive on your system so you may want to change the “Reduce Geometry” value to 2x or more until you’re ready to render. You’ll need to adjust Far, Fog Start, and Fog End values under the Visibility Tab in order to see the entire mesh. I set these values to the max value (1,000,000).
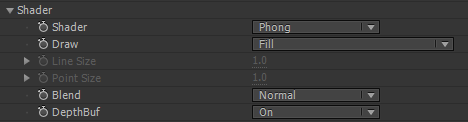
Under the Shader tab set the Shader to Phong. The mir will appear white because there are no lights in the scene. This effect doesn’t require lights, a custom texture will be created to “light” the bottom of the canyon, or the low points in the geometry. Set Blend to Normal and set DepthBuf to On.
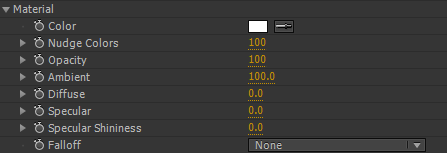
Under the Material tab, change Diffuse, Specular, and Specular Shininess to 0.
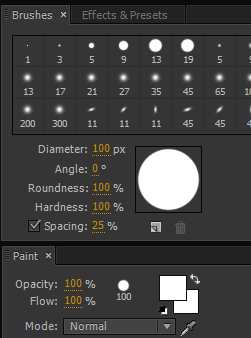
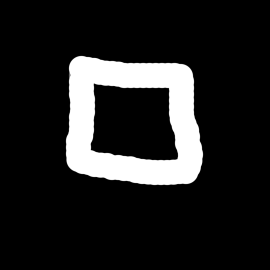
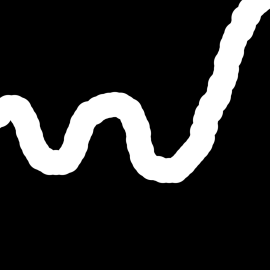
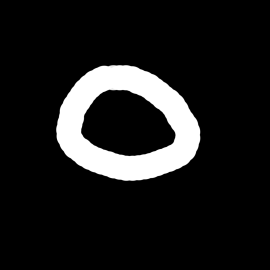
In order to create the canyon look, you’ll need to create a texture, and later tweak it to also be used as an amplitude map to displace the mesh’s geometry. Create a new composition and call it “texture”, same dimensions as before, and create a black (#000000) solid. Select the Brush Tool then double-click on your layer in the timeline to open the layer in the Layer Panel. In the Brushes Panel, create a round brush with a Diameter of 100 px and a Hardness of 100%. In the Paint Panel, make sure the color of the brush is white. Draw a path using the Brush Tool, it can be any shape you like. Check out the examples below for ideas.
Once you’ve drawn your path, create an adjustment layer and apply the Tint effect. This is where you can tweak the colors of your mesh. For my CALLING artwork, I set the “Map Black To” to a dark gray blue color and “Map White To” to a light gray. Apply a Fast Blur with a Blurriness of around 25 and check “Repeat Edge Pixels”. After creating the texture composition, you need to create an amplitude map to control the displacement of the mesh. Duplicate your “texture” composition and rename it to “amplitude”. Open the composition and on the adjustment layer, remove the Tint effect and add the Invert effect. Bring both of these compositions into your main composition and turn off their visibility.
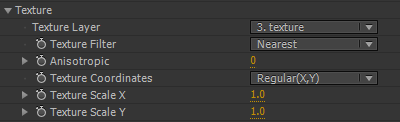
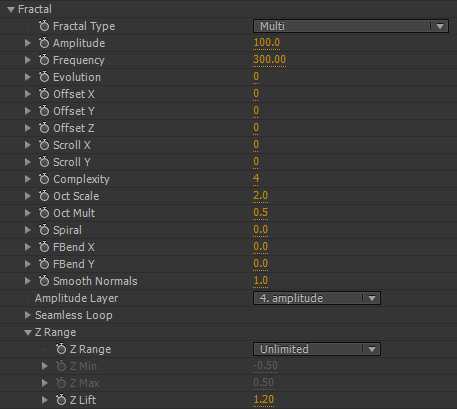
On the Mir layer under the Texture tab, set the Texture Layer to your texture composition. Under the Fractal tab, set your Amplitude Layer to your amplitude composition. Change the Fractal Type to Multi. Set your amplitude high, around 100 and your Frequency low, around 300. Under Z Range adjust Z Lift to your liking, I used 1.20.
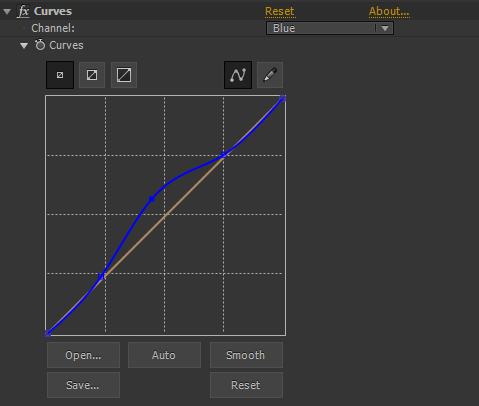
That’s all there is to create the effect, you could add color correction effects like Curves and Glow to make it pop, or tweak the Mir settings to create your own look. Remove the Invert effect from the amplitude composition to create a raised, “iceberg” look. To color the slopes of the mesh, you want to color the grey area in the texture composition. Add a Curves effect on the adjustment layer in the texture composition and bring up the Blue Channel in the middle of the curve graph.